Wednesday, March 28, 2012

Designer's Choice Challenge...

It's time for the Designer's Choice Challenge over at the House that Stamps Built! Kendra is the next designer up and her challenge was to make a Stair step card! 


Pin It
Share this on Pinterest!

Monday, March 26, 2012

JustRite Fan card Winner!

The JustRite Fan Card winner is Heidi G!  Heidi, please email me with your address and last name so that I can mail your card! Congratulations!

Heidi G said...
Wow, this is totally stunning!!! Love that you shared the tutorial as I had seen the original card on Pinterest. Thanks so much for sharing your amazing work.

Stamp of the Week - Beauty of the Springtime

Repeat Impressions "Stamp of the Week" is on their blog "The House that Stamps Built", and the "1304-J, Beauty of Springtime" is the featured stamp! The details to this offer is only available on their blog! Also, check out the rest of the design teams' fabulous creations with this fun and versatile stamp.

Pin It
Share this on Pinterest!

 My card today is filled with spring floral tones and I wanted to make Repeat Impressions "1304-J, Beauty of Springtime" the focal point. I stamped my image on JustRite Nested Medallion Label Dies then added ivory shading on the edges with Copic Markers E53 and E51. I layered that piece with pop-dots to Spellbinders™ Picot Edge Circles and added more shading on the edge. My designer paper is from the Colorbok Rosewood paper stack, my May Arts silk ribbon from Stamp Simply, and then I added decorative stickpins and a rose for embellishments.


Project Recipe:
Stamps: Repeat Impressions "1304-J, Beauty of Springtime"
Inks: Memento Tuxedo Black, Copic Markers E53, E51
Embellishments:  May Arts Silk Ribbon from Stamp Simply, Decorative Stick Pin, Floral Rose

Saturday, March 24, 2012

Happy Birthday, Wendy!!

CLICK HERE to see my JustRite Fan Tutorial and leave a comment to win the Fan Card! 

I am doing a special post today for a very special lady!! Today is Wendy Wyman's birthday, the owner of Repeat Impressions! The entire team and alumni has created birthday cards for her, and one of our team members combined them into a book and sent it off to Wendy!!

We are having a blog hop (list below), so make sure you hop to each designers blog to see the wonderful cards for Wendy! Lastly, go to the Repeat Impressions Facebook Page and wish Wendy a Happy Birthday!

My card uses Wendy's favorite tree, the Divi Divi tree (2409-M, Divi Divi Tree) that she sees when she goes to Aruba every December! I wish you the happiest of birthdays, Wendy, with love and family by your side!!

Pin It
Share this on Pinterest!

 Blog Hop List of Designers

Robin
Kendra
Dawn
Miriam
Makiko
Lynette
Vicki
Joy
Darsie (you are here)
Michele
Karen
Cheri

Thursday, March 22, 2012

Meljen's Designs Challenge!

CLICK HERE to see my JustRite Fan Tutorial and leave a comment to win the Fan Card! 

Today there is a new challenge at Meljen's Designs! Our challenge is to make an all "White" card or project! You could possibly win free digis by playing in our challenges, but you must use a Meljen's Designs digi to play!!
I'm sad to say that this is my last card for Meljen's Designs as I head off into other opportunities! I have so greatly enjoyed my two year tenure with the wonderful ladies on the Meljen's Design team and want to personally thank Melissa for the honor of creating with her wonderful images! I've had a blast!

My white card uses the "Heart Strings Parasol" digi!

Pin It
Share this on Pinterest!

Wednesday, March 21, 2012

What If Wednesday - Thinking of You

CLICK HERE to see my JustRite Fan Tutorial and leave a comment to win the Fan Card!

Today is the "What if? Challenge" over at "The House That Stamps Built" and I am using a fabulous sentiment called "8611-E, Thinking" from Repeat Impressions. Check out the rest of the design teams magnificent creations for the sketch challenge!

Pin It
Share this on Pinterest!

Monday, March 19, 2012

JustRite Fan Tutorial...

As promised, I have created a tutorial for the JustRite Stamps Fan card I made HERE! The fan wow'd so many of you and the emails I received for a tutorial was amazing! I appreciate everyone's kind comments about my fan as I love getting love from you!!!

This tutorial is photo intensive, as I show you not only how to make the fan but the card as well! Please click on the images to see them at full size to follow along with the instructions. (To do this simultaneously, right click on the image, then Open in New Window or Tab)

As a special treat, I am offering the Fan Card I created for this tutorial for a Prize!! Comment on this post and I will pick a random winner on Monday, March 26th. Please watch for the Winner announcement that day!! SPECIAL NOTE: You can email your comment to me if you prefer!

Pin It
Share this on Pinterest!

 JustRite Fan Tutorial

I will list the supplies I used for my card, but you can substitute with items in your stash! Of course, I encourage you to purchase the JustRite Stamps as they are perfect for this technique :)

Supplies:

Paper: K & Company Classic K Bailey, Ivory and Light Teal/Blue Cardstock
Ink: Versamark, Memento Tuxedo Black
Embossing Powder: Ranger Seafoam White
Accessories: May Arts Light Blue 1.25 inch Silk Ribbon, Recollections White Pearls, Copic Markers BG01 and BG10, Decorative Stick Pins, Recollection Rose
Tools: Martha Stewart Score Board, Heat Gun, Scissors, Liquid Glue (I used Beacon Adhesives 3-in-1 Glue), Embossing Stylus or Pencil, Corner Rounder Punch, Decorative Corner Punch

Getting Started:

1. Cut Patterned paper 5 1/4 x 4 3/4 inches and punch the upper right corner with your favorite decorative corner punch.
2. Cut Ivory cardstock 5 x 5 1/2 inches and round the upper right corner with a Corner Rounder punch. Adhere your patterned paper to this piece. Cut the Teal/Blue cardstock 6 x 12 inches and fold. Round the upper right corner with the Corner Rounder punch (front and back). Adhere your panel to your card.
3. Tie two bows with May Arts Silk Ribbon, one larger than the other.
4. Color 12 large white pearls and 8 smaller pearls with Copic Marker BG01.

Step 1 instructions:

1. Stamp two Scrolled Vine Background on Ivory cardstock with Versamark, then emboss with white embossing powder, using your heat gun. 
2. Once cool, cut the stamped images out. (You can use any background stamp for your fan, but make sure your pieces are sized 2 1/4 x 4 1/2 inches) You need three pieces. (Save the other piece for another card)
3.Score each piece in 1/2 inch increments. (1/2, 1, 1 1/2, 2, 2 1/2, 3, 3 1/2, 4 inches)
4. Fold each piece alternating between mountain and valley folds. (You should have 4 mountains and 4 valleys.)
5. Glue one end of the folded piece to another, as shown in the photo.
6. Glue the last piece to the second piece, as shown in the photo.
7. Using the photo as a guide, cut a small piece from the folded strip. This is so the piece is balanced.


Step 2 instructions:

1. Stamp 3 Lace Borders with Versamark on Ivory cardstock, then emboss with white embossing powder.
2. Cut the Lace Borders as shown, which will give you 12 pieces.
3. Fold each piece in half.
4. Glue one folded piece on the edge of the folded strip.
5. Glue all pieces and allow to dry thoroughly.
6. Turn folded strip over and apply a generous amount of glue to each fold.
7. Glue down onto your card, pinching the bottom ends to form the fan. While the glue is still setting, you can arrange each fold until you are please with it.


Step 3 instructions:

1. Stamp 1 Lace Borders with Versamark and emboss with white embossing powder.
2. Cut three pieces from the lace borders, using the photo as your guide. 2 pieces should have 3 upper loops and 1 should have 5 upper loops.
3. Glue the 2 smaller pieces to the bottom curved edge of the fan, as shown.
4. Glue the larger piece in the middle of the two smaller pieces, as shown.
5. Trim edges to the fan sides.


Adding Pearls, Bows and Rose instructions:

1. Add colored pearls, as shown.
2. Glue the larger bow to the bottom of fan, as shown.
3. Glue the smaller bow on top of the larger bow, as shown.
4. Adhere rose to middle of bow. (Edge of rose should be overlapping the looped pieces from Step 3.


Sentiment tag and finishing instructions:

1. Cut ivory strip 1/2 x 2 3/4 inches and stamp sentiment in the center with Memento Tuxedo black ink. Using a square punch, insert strip into corner of the square and punch to make a ribbon end.
2. Outline sentiment edge with Copic marker BG01, then soften with BG10.
3. With embossing stylus or pencil, curve sentiment piece, as shown.
4. Adhere to fan by inserting the left end of sentiment strip under the rose.
5. Add decorative pearls between each fan piece on card.
6. Insert decorative stick pins into bow.

If you have any questions, please feel free to contact me!! Don't forget to leave a comment for your chance to win the Fan card!!

Saturday, March 17, 2012

Meljen's Easter Card...

I created this darling Easter card using a Meljen's Designs digital image called "Easter Bunny". Meljen's has the cutest holiday stamps and all occasion stamps and are so easy to create with!! Make sure you hop over and buy one or two!!

Pin It
Share this on Pinterest!

Thursday, March 15, 2012

More JustRite Background stamps...

Over at JustRite Stampers, the design team is showcasing more of their fabulous Background stamps! Today we are using Ticking Stripe or Stitched Ribbon or a combination thereof! I created this pretty card using the Ticking Stripe background embossed with shimmery gold embossing powder on coordinating patterned papers from K & Company.

Pin It
Share this on Pinterest!

I used Spellbinders Label Twenty One for my main piece behind my sentiment and I embossed Ticking Stripe with Recollections gold embossing powder. My card worked up quickly after embossing the Ticking Stripe! I pushed the sides in towards the middle to get a small hump in my Labels Twenty One piece and glued the sides down onto my background patterned paper.

I adhered my floral background panel to a burgundy cardstock panel. I then stamped my sentiment from Spring Words onto one of the tags from Spellbinders Fancy Tags Two, (I cut the tag from patterned paper) and mounted it to another tag in a contrasting color. I looped pretty hand dyed silk ribbon from Hand-Dyed Fibers (tell Vikki I sent you) through the tag and adhered it to the back of my panel before gluing to a green card. I did pop dot my sentiment tag to my Labels Twenty One panel to give it dimension. I stamped my butterfly from Botanical Butterflies on a scrap piece of ivory cardstock, colored with Copic markers then added it to my sentiment tag. I finished the card off with pretty gold pearls.


Please take a few minutes to click on each of the fabulous JustRite design team member's name to see their inspiring creations using today's featured Background stamps: Ticking Stripe and Stitched Ribbon

JustRite Inspiration
Sharon Harnist
Linda Duke
Darsie Bruno you are here
Eva Dobilas
Angela Barkhouse

Just a reminder that JustRite Original Stamp Retirement Sale will end at midnight on March 21st.  After March 21st all these great stamp sets will return to full price.  These are the lowest JustRite Original Prices of the Year!

Project Recipe
Paper: K & Company Merryweather, Bazzill (Burgundy, Ivory & Green)
Inks: Versamark, Memento Tuxedo Black, Recollections Gold Embossing Powder
Accessories: Hand-dyed Fibers Silk Ribbon, Recollection Pearls, Copic Markers

Wednesday, March 14, 2012

Designer's Choice Challenge...

It's time for the Designer's Choice Challenge over at the House that Stamps Built! Lynette is the next designer up and her challenge was to make a Sympathy card! My sentiment stamp is  "8618-E, Remembering" by Repeat Impressions.

Pin It
Share this on Pinterest!

I stamped my sentiment on Spellbinders Labels Four and shaded it with Memento Lulu Lavender ink while it was still in the die. I used two fancy edge pieces from Twisted Metal Tags and Accents on the corners, then mounted that to a larger Labels Four panel cut from BoBunny's Enchanted Collection paper stack. I inserted the sentiment panel into the large Twisted Metal Tags and added pop dots to give dimension. I added the sentiment piece to the card front from the same paper stack, then added some Lulu Lavender to the four corners. I finished the card with gorgeous Venise lace, silk ribbon and seam binding. My final touches were the Recollection Pearls.

Project Recipe

Stamps: Repeat Impressions 8618-E, Remembering
Paper: BoBunny Enchanted Collection, Stampin' Up Whisper White, Black and White Bazzill
Ink: Memento Tuxedo Black and Lulu Lavender
Accessories: May Arts Silk Ribbon, Venise Lace, Seam Binding, Recollection Pearls

Tuesday, March 13, 2012

JustRite Border Stamps...

Today, the design team of JustRite Stampers is showcasing two gorgeous border stamp sets: Classic Scallop Borders One, and Lace Borders Two. 

I just love how versatile these borders are! If you'll remember, I created a sweet birdhouse using Classic Scallop Borders One, and you can see that post HERE! I decided to use the same technique that I used for the birdhouse roof for my card today. The "shingle" effect is quite striking against the paper I used. I just fell in love with the colors in the new Die Cuts with a View Coral Couture paper stack and had to use it!


Pin It
Share this on Pinterest!

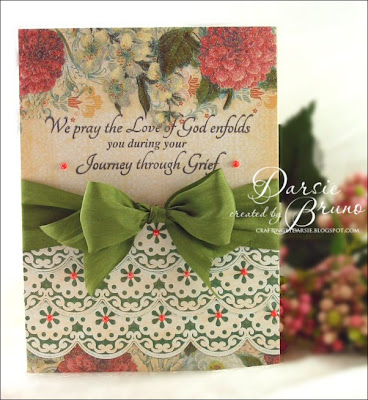
I stamp the border three times on green cardstock with Versamark ink, and embossed with Rangers Seafoam White Embossing Powder. I cut the borders out with scissors but you can also cut them with Spellbinders E8-001 Classic Scallop Edgeabilities. I then glued the border strips to my patterned paper, staggering the scallops, as shown. I added my sentiment from the With Sympathy stamp set, and tied a pretty silk bow, then mounted it to my white card. My last touch was adding pearls I had colored with Copic Marker R43.


Please take a few minutes to click on each of the fabulous JustRite design team member's name to see their inspiring creations using today's featured stamps: Classic Scallop Borders One, and Lace Borders Two:

JustRite Inspiration
Debbie Olson
Eva Dobilas
Darsie Bruno you are here
Angela Barkhouse
Kellie Fortin
Michele Kovack
Kazan Clark
Kathy Jones

Just a reminder that JustRite Original Stamp Retirement Sale will end at midnight on March 21st.  After March 21st all these great stamp sets will return to full price.  These are the lowest JustRite Original Prices of the Year!

Project Recipe
Paper: Die Cuts with a View Coral Couture Paper Stack, Bazzill (White & Green)
Inks: Versamark, Memento Tuxedo Black, Ranger Seafoam White Embossing Powder
Accessories: May Arts Silk Ribbon, Recollection Pearls, Copic Marker R43

Monday, March 12, 2012

Stamp of the Week - Goose

Repeat Impressions "Stamp of the Week" is on their blog "The House that Stamps Built", and the "1323-L, Goose" is the featured stamp! I am using a sentiment called "1305-G, Eggs-tra Special". The details to this offer is only available on their blog! Also, check out the rest of the design teams' fabulous creations with this fun and versatile stamp.

Pin It
Share this on Pinterest!

Sunday, March 11, 2012

JustRite Background Stamps...

This week, JustRite Stamps is showcasing their fabulous background stamps and I had a wonderful time creating with them! Each stamp has so many possibilities to jazz up your paper crafting.

My first card is a pretty fan using the Scrolled Vine Background and Lace Borders. My sentiment is from the With Sympathy stamp set.

EDIT: I will be writing up a tutorial for the Fan by the end of the week! Please check back!


Pin It
Share this on Pinterest!


For my rose, I stamped and embossed Vintage Wallpaper with white embossing powder on black cardstock. Then I used Spellbinders Spiral Blossom One die on that piece and created my rose!


Please take a few minutes to click on each of the fabulous JustRite design team member's name to see their inspiring creations using today's featured Background stamps: Vintage Wallpaper, Scrolled Vine, and Harlequin Script.

JustRite Inspiration
Darsie Bruno (you are here)
Michele Kovack
Sharon Harnist
Eva Dobilas
Kellie FortinKazan Clark
Kathy Jones
Heidi Blankenship
Angela Barkhouse

Project Recipe
Paper: K & Company Wedding, Bazzill
Inks: Versamark, Memento Tuxedo Black, Marvy Caribbean Blue, Ranger Seafoam White Embossing Powder
Accessories: May Arts Silk Ribbon, Recollections Rose, Decorative Stick Pins, EK Success Corner and Oval Punch, Recollection Pearls


Friday, March 09, 2012

JustRite Friday Challenge #068

It's time for the JustRite Friday Challenge and it's a Color Combination challenge! You must use Black, White and One other color of your choice on your project. The challenge starts today and runs through to March 21st and you must use a JustRite stamp on your project. If you upload to a gallery, make sure you use JRC_068 so that we can find your entry. There are prizes with each challenge and you could be our next Grand Prize Winner or Honorable Mention! 


Pin It
Share this on Pinterest!

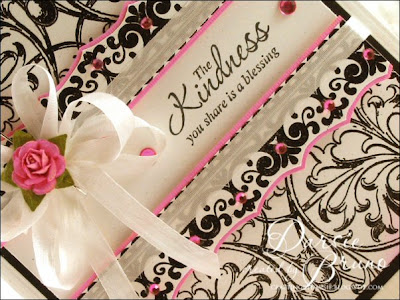
I created this pretty card for the challenge using Scrolled Vine Background, and Lace Borders Two. My sentiment is from Kindness. A silk ribbon bow, a pretty rose and some bling finished this card off in a jiffy!


Thursday, March 08, 2012

Meljen's Release and Challenge...

Today there is a New Release and challenge at Meljen's Designs The new release features delightful and whimsical themed images and our challenge is a sketch challenge! You could possibly win free digis by playing in our challenges!

My pretty card uses the "Fancy Swirls Peacock" digi! I used Spellbinders Samantha Walker Blossom Tags and Accents to frame the peacock, and tucked one of my bow pins into the pretty May Arts silk bow.

Pin It
Share this on Pinterest!

Wednesday, March 07, 2012

What If Wednesday - Beauty of Springtime

Today is the "What if? Challenge" over at "The House That Stamps Built" and I am using a fabulous sentiment called "1304-J, Beauty of Springtime" from Repeat Impressions. Check out the rest of the design teams magnificent creations for the sketch challenge!

Pin It
Share this on Pinterest!