Monday, July 27, 2015

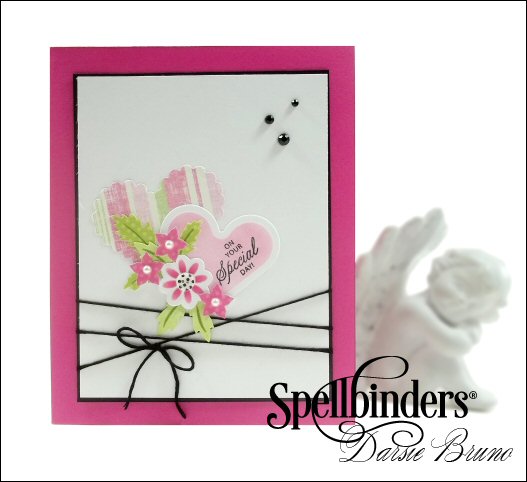
Special Day...

Hi everyone! I have another card for you using Spellbinders® Paper Arts newest little machine called the Sapphire Mini Die Cutting Machine, that is only available at JoAnn's. The machine cuts and embosses dies up to 2.25" wide, is affordable and portable. Spellbinders® Sapphire die templates allow you to cut, emboss and stencil shapes to make beautiful handmade embellishments for cards, crafts and more. They have a great price, starting at $4.99,  that allows you to experiment with paper crafting without making a big commitment. 


Pin It
Share this on Pinterest!

Project Recipe:
Paper: Patterned paper, Bazzill Basics Paper® White and Neon Pink Cardstock
Inks: Tsukineko/Imagine Crafts Memento Angel Pink, Rose Bud and Tuxedo Black ink pads, sponge dauber 
Embellishments: Polka Dot Button, Black Floss, Black Rhinestones, Melissa Frances White Pearls,  3D Foam Squares

Friday, July 24, 2015

Birthday Wishes...

Hi everyone! Have you heard about Spellbinders® Paper Arts newest little machine called the Sapphire Mini Die Cutting Machine, that is only available at JoAnn's. The machine cuts and embosses dies up to 2.25" wide, is affordable and portable!

For my card today, I've used Fleurs and Flourishes Die Set, an 11-piece set of beautiful flourish design die shapes, perfect for creating embellishments, adorning cards, scrapbook pages and more. Spellbinders® Sapphire die templates allow you to cut, emboss and stencil shapes to make beautiful handmade embellishments for cards, crafts and more. They have an affordable price, starting at $4.99,  that allows you to experiment with paper crafting without making a big commitment.

Pin It
Share this on Pinterest!

Project Recipe:
Paper: Maja Designs Life in the Country patterned paper, Bazzill Basics Paper® White and Olive Green Cardstock
Inks: Tsukineko/Imagine Crafts Memento Summer Sky and Tuxedo Black ink pads, sponge dauber 

Wednesday, July 22, 2015

Multi-Step Poinsettia...

Hi everyone! Today, I have created a Christmas card for you using one of the last stamp sets released by JustRite Papercraft called "Multi-Layered Poinsettia" . This set is available through The Stamp Simply Ribbon Store  and I have a photo tutorial for you below!

Pin It
Share this on Pinterest!

 
Multi-Step Poinsettia Tutorial
Project Recipe:
Paper: Bazzill Basics Paper® White Cardstock
Inks: Tsukineko/Imagine Crafts Memento Cottage Ivy, Bamboo Leaves, Lady Bug, Love Letter, Peanut Brittle, Northern Pine ink pads

The Stamp Simply Ribbon Store carries a versatile collection of supplies for your papercrafting needs from Spellbinders dies, JustRite Papercraft stamps and other stamps, ribbons of all textures, styles and thicknesses, beautiful papers from a multitude of companies and lots of fabulous embellishments.


Monday, July 20, 2015

Dare to dream...

Hi everyone! I have a new tag in my continuing Victorian Women Series featuring the works of Harrison Fisher, a popular artist that symbolized beautiful women in the Victorian era.  This is one of my favorite images from him, and I paired it with pretty filigree Spellbinders dies and complimented it with lace and silk ribbon from The Stamp Simply Ribbon Store.

Pin It
Share this on Pinterest!

Project Recipe:
Paper: Patterned paper, Bazzill Basics Paper® Ivory, Light and Dark Aqua Cardstock
Inks: Tsukineko/Imagine Crafts Memento Angel Pink and Tuxedo Black ink pads, sponge dauber 

Saturday, July 18, 2015

Missing you...

Hi everyone! Today, I am showcasing the newest Stylus tips for Spellbinders® Tool 'n One™ and they are the perfect size for embossing and creating flowers! I used their Flower Play die template set to make my flower and you can see the different sizes of tips I used below. The smallest tip is great for creating veins in your leaves! These are must have for your crafting tool box. 

~ Enjoy!

Pin It
Share this on Pinterest!

Designed to work with Spellbinders® Tool 'n One™, this set of three stylus tips comes in different sizes and is made of stainless steel to resist rusting. These tips are perfect for making dimensional petals from their Create-a-Flower series to dry embossing through their die templates. This set is a "must have" in your basic tool kit. A small plastic pouch is included for easy storage.

Approximate Size:
Stylus 1: 1 mm
Stylus 2: 3 mm
Stylus 3: 6 mm

 
Project Recipe:
Paper: Watercolor Paper, Bazzill Basics Paper® White and Dark Blue Cardstock
Inks: Ken Oliver Color Burst, Tsukineko/Imagine Crafts Memento Lavender, Sweet Plum and Tuxedo Black ink pads, 

Wednesday, July 15, 2015

Christmas Poinsettia...

Hi everyone! Today, I am showing you a pretty Christmas card using some of the newest Spellbinders Paper Arts die templates and pairing it with one of the last stamp sets by JustRite Papercraft. My frame is a beautiful die set by Spellbinders and Amazing Paper Grace Becca Feeken called Arched Elegance.

My poinsettia was created using "Multi-Layered Poinsettia" clear stamp set that is available from The Stamp Simply Ribbon Store. This set will go extremely fast, so hurry and grab it while you can. I will be posting the tip sheet on how to make this beautiful Christmas flower in my new Facebook Group! You can join HERE!

Also, I am teaming up with Patience Brewster, an artist of handcrafted ornaments and figurines, in celebration of "Christmas in July"! Pop over to their store and see some of the most darling figures and holiday items you'll ever find! Even better, they are also having a giveaway and you can learn all about it HERE!

Pin It
Share this on Pinterest!

Project Recipe:
Paper: KaiserCraft Enchanted Garden 6x6 paper pad, Bazzill Basics Paper® White, Sage and Red Cardstock
Inks: Tsukineko/Imagine Crafts Memento Cottage Ivy, Bamboo Leaves, Lady Bug, Rhubarb Stalk ink pads, Versamark, Gold Embossing Powder

The Stamp Simply Ribbon Store carries a versatile collection of supplies for your papercrafting needs from Spellbinders dies, JustRite Papercraft stamps and other stamps, ribbons of all textures, styles and thicknesses, beautiful papers from a multitude of companies and lots of fabulous embellishments.

Tuesday, July 14, 2015

Fun news!

Hi everyone! I'm so excited to announce that I have opened my own Facebook Group called "Crafting with Darsie" where I hope you will be inspired by projects I create with the newest tools, dies and stamps on the market today! 

Join me and let's talk about all kinds of papercrafting, cardmaking, scrapbooking, and mixed media projects. Everyone can share and learn from each other! We'll have challenges, contests, giveaways, tips and techniques, videos and more! 

I'll show you all the tips and tricks of how I create my cards and you can ask me any kinds of questions! Come join in the fun! Invite your papercrafting friends! Simply click the link above to join!

Pin It
Share this on Pinterest!

Monday, July 13, 2015

Wrapping my arms...

Hi everyone! Today, I have a darling card for you using a cookie template I found on Pinterest HERE! I just love that owl and will be making more of these. I really like the felted owls and will be making one of them, so stay tuned for my version soon! Using bright and colorful patterned papers made this little guy turn out adorable! I paired it with Spellbinders Paper Arts® Out on a Limb, and Marisa's Bouquet to finish the card.

~ Enjoy!

Pin It
Share this on Pinterest!

Project Recipe:
 
Paper: Colorful patterned paper, Bazzill Basics Paper® White, Light Blue, Black, Olive Green and Light Yellow Cardstock
Inks: Tsukineko/Imagine Crafts Memento Love Letter and Bamboo Leaves ink pads
Embellishments: Polka Dot Buttons, Black Rhinestones, 3D Foam Squares

Friday, July 10, 2015

Cow Treat Box...

Hi everyone! Today, I have another fun project using Spellbinders Paper Arts® Core Basics and I was inspired by a cute cow treat box I saw on Pinterest. Here is my version and a tutorial below to make one for yourself using your basic dies of circles, ovals and hearts! How cute is he?

~ Enjoy!

Pin It
Share this on Pinterest!

Supplies:

Paper: Bazzill Basics Paper®: White, Gray, Yellow, Pink, Blue, Black
Inks: Tsukineko/Imagine Crafts Memento Summer Sky, Angel Pink and London Fog ink pads
Miscellaneous: Sponge Dauber, Scor-Pal, Glue and Scissors

Instructions:
 (click on template and right click to save to your computer)

1. Cut 2 panels 7 x 8 inches from white cardstock. Score and cut as shown on template above. Fold and glue box together. Box size is 3 3/4 inches x 3 3/4 inches
 2. Cut 2 Standard Circles LG #7 from white cardstock. Cut 1 Classic Hearts #3, cut in half and round the bottom, as shown in the photo above. Cut 1 Classic Ovals LG #3 from yellow cardstock, then center #2 onto the #3 die cut and cut (as shown in the photo above). Glue ears and horns to the back of one of the Circles #7 die cut.
3. Cut 1 Classic Ovals SM #5 from pink cardstock. Cut 2 Standard Circles LG #1 from black cardstock. Glue the two black circles to the pink oval and shade with Memento Angel Pink ink using a sponge dauber. Cut 2 Standard Circles LG #1 from blue cardstock. Cut 2 Classic Ovals SM #1 from black cardstock. Glue the black ovals to the blue circles and shade with Summer Sky ink.
4. Cut 10 Classic Ovals SM #2 and #3 from black cardstock. Cut out small pieces on the edge of the ovals to resemble the spots on a cow. Glue small spots onto the cow head and trim the edge. Glue the rest of the spots onto your box. Adhere the eyes and nose to your cow head as shown.
5. Cut 2 Classic Hearts #4 with black cardstock. Cut each heart die cut as shown in the photo above. Cut 2 Classic Ovals LG #4 with gray cardstock. Glue hearts to gray ovals and shade with Memento London Fog ink using a sponge dauber.
6. Glue feet to front of box and glue head to back of box as pictured. Glue the remaining Standard Circles LG #7 to the back of the head/box. Fill box with treats.

Wednesday, July 08, 2015

You are in my thoughts...

Hi everyone! It has been a while since I've posted as I was visiting my brother in Virginia. I am able to go see him once a year, so I stayed a few extra days and we had a blast! We laughed, went to movies, went shopping, and I cooked up a storm for him. I miss him already!

Today, I am showing you how to create a gorgeous card using Spellbinders Paper Arts® Core Basics which consists of most of the dies you already own: Circles, Squares, Rectangles and Ovals. If you think that you can't make a fabulous card using your basic dies, then you will see how easy it is!

Pin It
Share this on Pinterest!

For my card, I used a coordinating paper pad that I found HERE called Vintage Autumn Basics by Maja Designs. I am so in love with Maja Designs paper pads and I had to purchase two of each, just because! With the coordinating paper pad, I simply cut my basic dies and layered them as shown and added a Victorian Woman cut out, lace, pearls and a pretty white silk bow. It can't get easier than that!

Project Recipe:
 
Paper: Maja Designs Vintage Autumn Basics, Bazzill Basics Paper® White, Green and Dark Burgundy Cardstock
Inks: Tsukineko/Imagine Crafts Memento Angel Pink, Rich Cocoa ink pads