Wednesday, January 01, 2014

Seasons Givings Blog Hop!

Happy New Year!


I'm thrilled to be participating in the Seasons Givings Blog Hop this year and if you've never been here before, I want to welcome you to my crafting journey! A big thank you to my loyal readers, new readers and blog hoppers for taking the time to visit and see what I've created for you today.

My card features a background stamp called "Tufted Vintage Labels Seven" released today by JustRite® Papercraft, and they are currently having a giveaway as well (not affiliated with my giveaway)! My pretty sentiment and butterfly is from their set called Winged Vintage Labels Two and Three. At the end of this post, you'll find the project recipe for my creation:

Pin It
Share this on Pinterest!

The Seasons Givings Blog Hop is all about our readers, who visit us daily, leave comments and share our world and we want to give something back. Every blog on this hop is having a giveaway! That's right, you have 81 chances to win some wonderful blog candy! Below is the Blog hop list, and you will be inspired and amazed!

To enter my giveaway, simply leave a lovely comment! To get your name added TWICE to the drawing, become a Follower of my blog. Subscribing to my YouTube Channel will get you THREE entries to win the crafting goodies pictured below! You have until Midnight, January 5th to enter. I will pick the lucky winner on January 6th and announce it on my blog, so set the date and come back for a visit to see if you've won!

Find me on Facebook and Pinterest!

Prize includes: Spellbinders® Paper Arts Decorative Labels Eight, Recollections Happy Birthday Stamp set, DCWV Kidosaurus Paper pad, DCWV Valentine paper, Rainbow Color Wheel, Recollections Pink Rhinestone Stickers, SewEasy Fancy Floss, Xyron Glue Stick and Adhesive Dots, Scrapbook Adhesives by 3L Crafty Foam Tape, MyStik Tape Runner, and American Crafts Zing White Embossing Powder

I hope you have enjoyed your visit, and I wish you the Happiest and Healthiest of New Years. Whatever your journey is, I pray that you have love, faith and happiness along the way!

 ~ Darsie

Blog List

Darsie Bruno (you are here)

Project Recipe:
Paper: Bazzill Basics Paper® White, Dark Gray and Black Cardstock
Embellishments: 1/4 White Silk Ribbon from The Stamp Simply Ribbon Store, Viva Decor Pearl Pen: Lavender, White Pearls, Pearl Floral Sticker  Beacon Adhesives, 3D Foam Dot

Tuesday, December 31, 2013

Tutorial Tuesday ...

JustRite® Papercraft has a new feature on their blog today called "Tutorial Tuesday", where the designers will take turns creating video or written tutorials! I am up first and I share a tutorial on a technique for creating designer paper using their large background stamps. In the video, learn how to make 3 different style backgrounds for your papercrafting projects.

You’ll see how to achieve stunning backgrounds by simply changing the ink pad colors. Unlimited color combinations of ink pads coupled with any of their background stamps, and your creations will be spectacular. I show you how to create an elegant look for your greeting cards with easy to follow instructions. This technique can be used for greeting cards, scrapbook pages and mixed media projects. 

Make sure you subscribe to my YouTube Channel and JustRite Papercraft's YouTube Channel so you don't miss out on Tutorial Tuesday videos!

Here is a sneak peek of the card I created with the multi-colored background.  

Pin It
Share this on Pinterest!

We would love to know what techniques you would like to see in our new series!!  Leave a comment on the JustRite® Papercraft blog detailing what you would like to learn in 2014, for your chance to win a $100 JustRite Shopping Spree.  Subscribe to their YouTube Channel for a second chance to win the Shopping Spree! Leave a message by Saturday January 4th at midnight for your chance to win! 


And to celebrate the New Year we have a 25% off coupon code - simply use this code during check out NEWYEAR (all caps with no spaces) to receive 25% off your entire purchase . Sale ends January 15th at midnight EST. 

Sunday, December 29, 2013

New Year's Eve Party Tags!

Hi everyone! Today I am Featured Designer on the Spellbinders® Paper Art blog and I am showing you how to create with the Imperial Gold Enhancing Elements die templates. Hop over to the blog and learn a little bit more about me and enter to win ALL of the fabulous dies I've used in my project!

I've created a fun Bottle and Wine Glass tag for your New Year's Eve Party. You'll find all the supplies listed below and a full tutorial. To enter to win ALL the dies I used in my projects, click HERE!! Don't forget to become a follower and subscribe to my YouTube channel!

Pin It
Share this on Pinterest!


Project Recipe:
 
Instructions:
 
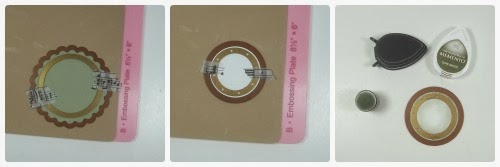
  • Cut/emboss Classic Squares LG #5 (with #1 being the smallest) with olive cardstock. 
  • Nest Gold Squares One #3 inside Classic Scalloped Squares LG #3 (use washi tape or low-tack tape to secure) and cut/emboss with white cardstock. 
  • Nest Gold Squares One #1 inside Classic Squares LG #2 and cut/emboss with olive cardstock.
  • With Classic Square #2/Gold Squares One #1 die cut in template, stencil with Olive Grove ink with a sponge dauber. 
  • With Classic Scalloped Square #3/Gold Squares One #3 die cut in template, stencil with Olive Grove ink with a sponge dauber.
  • Add 3D Foam dots to small square die cut and adhere to large square die cut.
  • Nest Gold Rounds One #4 inside Classic Scalloped Circles #4 and cut/emboss with olive cardstock.
  • Nest Gold Rounds One #3 inside Standard Circles #3 and cut/emboss with white cardstock
  • With Gold Rounds One #3/Standard Circles #3 die cut in template, stencil with Olive Grove ink with a sponge dauber.
  •  Adhere both die cuts on top of each other.
  • Cut/emboss Standard Circles #1 in center of large scalloped die cuts.
  • Cut from the outer scalloped edge to the center for your wine glass tag.
  •  Stamp "Happy New Year" with Tuxedo Black ink on white cardstock panel, roll against a pencil for your banner sentiment.
  • Add black rhinestones to your Bottle Tag and Wine Glass Tag.
  • Adhere your sentiment banner to the large tag, then add 3d foam dots to the back and affix to your wine bottle.

Thursday, December 26, 2013

Let it Snow!

We woke up to a couple of inches of snow yesterday, which gave us a White Christmas! It put me in the mood for snowflakes and glitter and sparkle! I've created this pretty wintry tag using Spellbinders® Paper Arts 2013 Snowflake Pendant! I love the colors of ivory, aqua and champagne together and really like how this turned out! Happy Winter!

Pin It
Share this on Pinterest!


Project Recipe:
Paper: The Paper Studio Snowflake patterned paper, Bazzill Basics Paper® Ivory Cardstock, Doodlebug Champagne Glitter Paper
Embellishments: Aqua Seam Binding from The Stamp Simply Ribbon Store, Beige Glitter, Pearls and Rhinestones,  Beacon Adhesives, 3D Foam Dots

Wednesday, December 25, 2013

Merry Christmas!

I would like to wish all of YOU the Merriest of Christmas, the Happiest of Holidays and a wondrous day filled with family, love and blessings!! 

~ Darsie

Pin It
Share this on Pinterest!

Project Recipe:
Paper: Bazzill Basics Paper® White and Red Cardstock
Embellishments: Red Rhinestones,  Beacon Adhesives, 3D Foam Dots

Thursday, December 19, 2013

Festive Poinsettia ...

It's less than a week until Christmas, and I am winding down my holiday card making! Here is a pretty card I created using Spellbinders® Paper Arts Layered Poinsettia with JustRite® Papercraft Festive Poinsettia. My background was made by cutting the dies out of post-it notes, then sticking them to white cardstock. I used Creative Inspirations paints and dabbed color over the surface until I was happy with the results. I then removed the post-it notes and over stamped with the Festive Poinsettia stamp in red ink. Add designer paper and a big black silk bow and it is finished! ~Enjoy~

Pin It
Share this on Pinterest!

Project Recipe:
Paper: My Mind's Eye Blush Collection, Bazzill Basics Paper® White, Mauve and Black Cardstock, Doodlebug White Glitter Paper
Embellishments: Black Silk Ribbon from The Stamp Simply Ribbon Store, Black Decorative Pearls,  Beacon Adhesives

Tuesday, December 17, 2013

Ombre Bangle Bracelet...

In case you haven't seen or guessed, I am in love with Julianna Hudgins Jewel Loom™ and just love creating jewelry pieces with it! Since joining her design team, two months ago, I have tried to find a way to create a bangle type bracelet and I have done it with success!! Woohooo!! 

After I made the length of 5 rows across by 34 rows long, I inserted 22 gauge wire back through the beads then cut it off the loom and connected both ends with wire. This gave me the stiffness of the bracelet I was looking to achieve. I love the ombre colors of the beads!!

Pin It